Viewing entries in
Guitar Tech

ADJUSTING PICKUP HEIGHT (a quick tone change)

Most guitar players never think about changing the height of their pickups for a quick, but potentially dramatic tone-changer. Yes, potentially dramatic.

Some simple rules.

Pickups closer to the strings? Yes, more output! Closer pickups will deliver a higher output with a more pronounced and defined high end. But you will not necessarily maximize your sound by just setting the pickups as high as they’ll go. In fact, a higher setting can diminish an otherwise outstanding guitar tone in a few different ways. Most importantly, you can quickly lose a LOT of clarity.

Pickups further from the strings? Cooler output. More clarity. But you can also start sounding a little bass-heavy. As well, you can lose sustain so be careful with that height.

So what is the proper height? If you do a web search on this topic, you’ll find that everyone seems to recommend something different. We recommend between somewhere close to 5/64" on the bridge pickup, and about 4/64" on the neck. Keep in mind, these are measurements on the Low-E side. On the High-E, we might suggest you move it just a tad closer (say 1/64" on each pickup). 

Adjusting height is easy. All you need is the appropriate ruler and a Phillips-head screwdriver. Turn the adjustment screw one way and the pickup drops. The other, it raises. Measure it by setting your ruler on the pole of the pickup and measuring to the bottom of the string.

Done and done. Remember, there's no right or wrong answer here. It's what sounds best to you. Try this out. You may find new life in your pickups, your guitar and your tone! 

10 EASY WAYS TO IMPROVE YOUR TONE FOR UNDER $10

1)  Try a new pick.  Yes, a pick can change your tone.  Try thicker or thinner as well as different materials.  Rumor has it that Billy Gibbons got his tone using a Mexican Peso as a pick.

2)  Change string gauge/type.  Coated v. uncoated, and different materials can quickly change brightness, punch and related tonal properties.  Changing gauge can add thickness or bottom end to your tone as well.  Remember, changing gauge requires neck AND intonation adjustments.

3)  Vary your pickup height.  Back your pickup down even a turn or two and you can add clarity while slightly reducing output, which changes how your amps sounds as well.  Bringing your pickup up can add output and gain, but watch out for feedback if you get the pickup too close.

4)  Re-dial your amp!  Turning the knobs is a great way to change tone of course!  Remember, the guitar is a predominately mid-range instrument.  Suck out the mids and you suck out the key frequencies of your instrument.  Don't "dial with your eyes."  The numbers on the dials are kinda arbitrary.  Not all amps are alike and just because you think it should be dialed a certain way doesn't mean it should.  Mids are critical, gain is best when rolled back for a thicker sound and as important, understand the difference between presence and treble!  Remember - vary the volume and gain to get different tones.  See my other post on the relationship between volume and gain here:  

5)  Eliminate all your effects.  Most pedal boards or rack systems will eat tone also if they're not set up properly.  So take them out for a while and get all your tone back.  Then start to add back in only what you NEED.

6)  Double your tone.  Use your delay pedal and just add a quick, single repeat, slap-back delay.  It creates the effect of two guitars.  Don't put this in your loop.  Drop it in front.  The delay time should be something very short.  You're not trying to hear the echo so much as create the feel of two guitar players playing at the same time.

7)  Change the volume pot in your guitar.  Varying values can wildly change the way your guitar sounds.  Many hum/hum guitars come standard with a 250K pot.  Using a 500K can create a very different feel.  If you play with EMG's, try chaining the 25K pot for a 250K and get a warmer, more organic sound.

8)  Vary your pick technique and fretting.  Holding the pick too loose will create a weaker sound and too tight your tone may get too harsh.  Keep in mind that good picking should have the pick crossing the strings at a bit of an angle.  Vary it.  If your pick hits the string too flat, not so bueno.  On fretting, remember that you should fret just behind the fret, as close as possible but not on the fret.  If you're on the fret, you'll mute or dull your tone.  Vary these things for optimal results.

9)  Check your amp's bias.  If it's too low, your amp will sound cold, dull and lifeless.  If it's too hot, the amp will sound bright and harsh.  Oh, and you're tubes will fail faster.  Check with your amp's manufacturer for appropriate bias.  Enlist the help of a qualified tech if you don't know what you're doing.  Tubes change over time, so bias should be frequently checked!!!

10)  Get a new cable!  Cheap cables (or cables that are too long) can eat tone.  And remember, fancy jackets don't mean high quality.  The guts of the cable matters.  Cheap cables always have lame guts.  Try a high quality Mogami or a 4 conductor Beldon Brilliant from CBI.  These can add juice back in.  It's kinda like towing a heavy gear trailer with a VW bug versus a GMC 8 cylinder truck.   Ok, this one may not be under $10.  So I'll give ya a freebie. . .

11)  Practice!  Remember, most tone is in your fingers. . .

KEEPING YOUR FLOYD ROSE IN TUNE.

Very common question.  How do I keep my Floyd Rose in tune?  First let me say this, I genuinely believe that the Floyd Rose trem is one of the best guitar bridges on the market, even if you don't use it for its trem function.  When set up correctly, you should not have problems.  That being said, if it's not set up properly, you can have problems keeping the guitar in tune.  So if you're having issues, here's some things to look into. 

1)  Your most likely issue is the guitar's setup itself.  So before you assume it's the bridge, have the intonation, neck angle, etc checked.  If that's off, the bridge won't function correctly.

2)  The setup of the Floyd itself has 2 critical issues.  First, make sure it is level with the body.  See the picture. . .  Second, make sure the counter springs in the back aren't over or under rated.  If you use heavier strings, you may need 3 springs.  For lighter, you may need only 2.  Check with Floyd Rose for the best application for your setup.

3)  Check your hardware.  Make sure the intonation screws and saddle locks are very tight.  Make sure your locks at the nut are tight, but don't over-tighten the locks on the nut.   These do NOT have to be cranked over-tight. Over-tightening here, in my experience, can cause issues.  But otherwise, make sure everything is tightened down.

4)  If you have a "Licensed Floyd", check your knife edges.  "Licensed" versions tend to be made of softer metal to keep the cost down.  This leads to premature wearing down or chipping of the knife edge.  This can quickly cause the Floyd to work improperly.  Don't fret if you have issues here.  There's plenty of guides on the net for resolving this problem, although the best solution in my opinion is to replace the bridge at that point with an actual Floyd Rose product.  If you're not sure, if your Floyd is "Licensed," it will say so right on the top of the bridge.  Just look for the word "licensed."  Anything else is most likely a genuine Floyd product.

WANT TO SET UP YOUR OWN GUITAR? Great for x-mas!

Found this on a mailer.  Thought you all would love it.  For those wanting to learn to tech their own guitar, basic setup skills are essential for the guitar player.  If you're going to do it, you need the right tools.  Assume please that I put in some clever story here about the right tool for the job. . .

ANYWAY, great gift idea for you or your guitar lover in your life.  For under $100, you can get a kit with all the tools you may need.  Check it out here:  http://www.stewmac.com/Gifts/Basic_Setup_Kit.html

FRET BUZZ? DON'T FORGET THE BRIDGE SADDLES.

So you have some fret buzz?  Don't be too quick to adjust the neck.  Your problem may not be there.  Remember - since your neck has a radius, the strings must be on a radius too.  This is generally handled at the nut (although not always and not always precisely), but the real radius happens at the bridge.  Many bridges have adjustable saddles.  If so, start there.  It's much easier. 

To do this, you must know the radius of your neck.  If you don't, don't "fret," you can get a simple too from any number of places that will tell you.  Then check the radius at the bridge to make sure it matches.  If your bridge lets you adjust, make sure the radius is correct.  Often times your problematic string may be too low.  Raise the bridge saddle to match the radius and the buzz can buzz off. 

Some bridges will let you adjust the height.  Some can be more difficult or involved.  Sometimes it's done by raising the bridge on one side or another and then "slotting" the saddles correctly.  So know your bridge (or learn it) and know your options.  Either way, adding more relief to the neck can undesirably raise the action.  Point is?  Check here too!

COMPOUND RADIUS FINGERBOARDS. . . Much ado about nothing

So I hear a lot about compound radius fingerboards.  Here's what I say.  To quote Chuck D (Public Enemy), "Don't believe the hype, it's a sequel, as an equal, can I get this through to you?"  haha.  Public Enemy not withstanding, to understand this, understand what it is, and what the radius of your fingerboard really is. 

To understand the fingerboard radius, take the one I use for example.  12" radius.  Draw a circle with a 12" radius (distance from the center to the outside edge) (that's a 24" diameter - distance all the way across).  Now, look at your fingerboard.  Usually a little less than 1 3/4" across at the nut, and about 2" at the 12th fret.  Cut that distance out of the circle and you have the radius of your fingerboard.  

A radiused board is uniformly curved its full length, as if it were the top of a cylinder.  Typically, guitar strings are not parallel: they're closer together at the nut, and they spread wider apart at the bridge.  For this reason, people feel that if you use a straight radius down the board, the strings would rise too far off the fretboard at some points.  So the compound radius was born.  For example, you may see one radius (say 10") at one endof the board, and another (say 16") at the other end.  This causes more of a taper (or conical shape) to the fingerboard, which is said to track the string taper more evenly for more comfortable playing.  Sounds awesome, huh?

Yeah well, what does it really mean to you?  I've made a drawing to scale and shown you 10", 12" and 16" radius overlayed, then two sections of the neck (nut/red, 12th fret/blue).  Look at the edge of the sections of the fret board and look for any perceptible difference.  Here's the math.  When you're dealing with a 2" section of a 24" circle v. a 2" section of a 20" or 32" circle, your talking about a variation in radius of the fretboard that is so small, it can't be measured unless you have a very particular ruler that can give you, at minimum, hundredths of an inch.  Most rulers will give you 1/16, or maybe 1/32.  This is 1/100.  Your talking about a distance less than the difference between a 9 and 10 gauge string.  While we can feel the difference between them, it's not the string size we're really feeling, it's more the tension of the string. 

So here's my thought.  While it's fine in theory, the reality of you feeling it, or particularly feeling any effect of it, is slim at best and none in reality.  What it is, is complicated to make and expensive, for little benefit at best.  And we're talking about wood here, not precision machinery.  And we're talking about fractions so small, they're nearly imperceptible. 

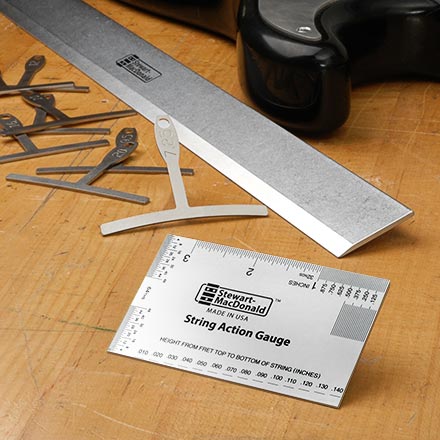
BUT............ what does make a difference is something most people ignore or forget about.  When you feel a brand new compound radius guitar, then your own, you may want to throw rocks at your guitar.  But it's not really the radius.  When is the last time you had the height of the bridge saddles checked??????  Oh yes, more likely your issue.  The height of the bridge saddles should match the radius of your neck.  Have that adjusted and you're guitar will feel a ton better!  Rather than spending a pile your hard earned money on a brand new shiny compound radius neck, try a few bucks on a professional setup!  And maybe check out a little old school Public Enemy.